

Understanding version control and mastering git - Branches and more...!!
I am Nandan, And you probably know me as a "Software Engineer who "hacked" an Airline to retrieve his luggage".
I am a full-time Software Engineer, Tech Speaker, and mentor. I enjoy talking about Web Development, Machine Learning, Natural language Processing, Machine learning Accelerated Mobile Pages, Progressive Web Apps, Cybersecurity, Chatbots, etc.
My claim to fame was when I posted a series of tweets on Twitter about data privacy issues on an airline’s website and the tweet got viral for all the good reasons. The story was covered by all major media portals all around the world including BBC, Saudi Gazette, Times of India, Boing Boing, Lallantop etc. and I have been interviewed by some major radio channels and podcasts.
In my free time, I like to indulge myself in activities like Photography, Gardening, Snooker, or Boxing. I am a proud owner of many plants, I sometimes talk to them (mostly pep talks).
In my last blog, We learned about version control and its use in software development. We also understood some of the basic git commands like config, clone, commit, and push. As a beginner both in git and a project, these commands come handy and get us going.
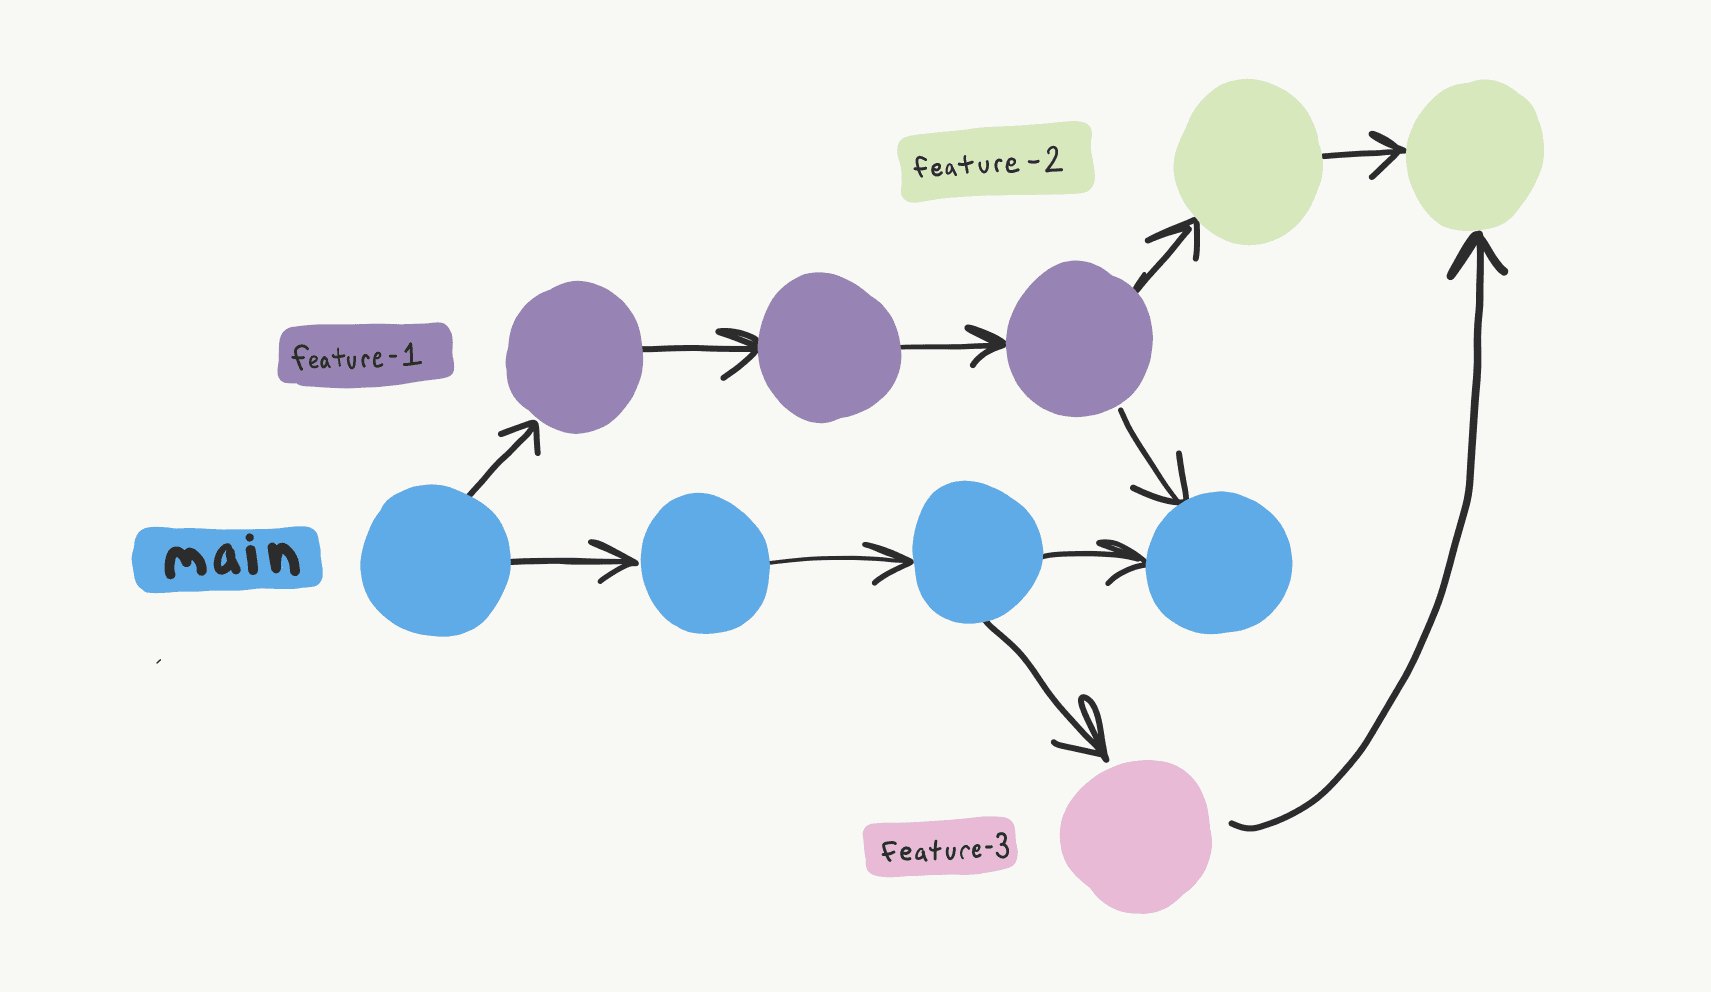
As we grow and our project grows, so does the team. With all the growth, it becomes tough for developers to manage code and keep track of all the contributions. This is where branching comes into the picture.
What is a branch
In Git, a branch is a new/separate version of the main repository. It represents an independent line of development. It also serves as an abstraction for the edit/stage/commit process which means that whatever changes you make in a branch, do not affect your master/main [T&C Apply].
Some Branching commands
- Create a new branch, But do not switch to it
git branch <branchname> - Switch to an already created branch
git checkout <branchname> - Create a new branch and switch to the branch
git checkout -b <branchname> - List all the branches in your repo, and it also shows what branch you're currently in
git branch - Push the branch to your remote repository, so others can use it
git push origin <branchname> - Push all branches to your remote repository
git push --all origin - Delete a specific branch
git branch -d <branchname> - Delete a branch on your remote repository
git push origin:<branchname>
Well... That was a lot of branching knowledge and contrary to the law of conservation of energy, a branch can be created or destroyed (deleted) and the only way to preserve it, is to finally merge it to master or to its target.
What is a merge
Merge is the process of taking the contents of a source branch and integrating them with a target branch.
Remember the T&C I had put earlier? It's time we trace back.
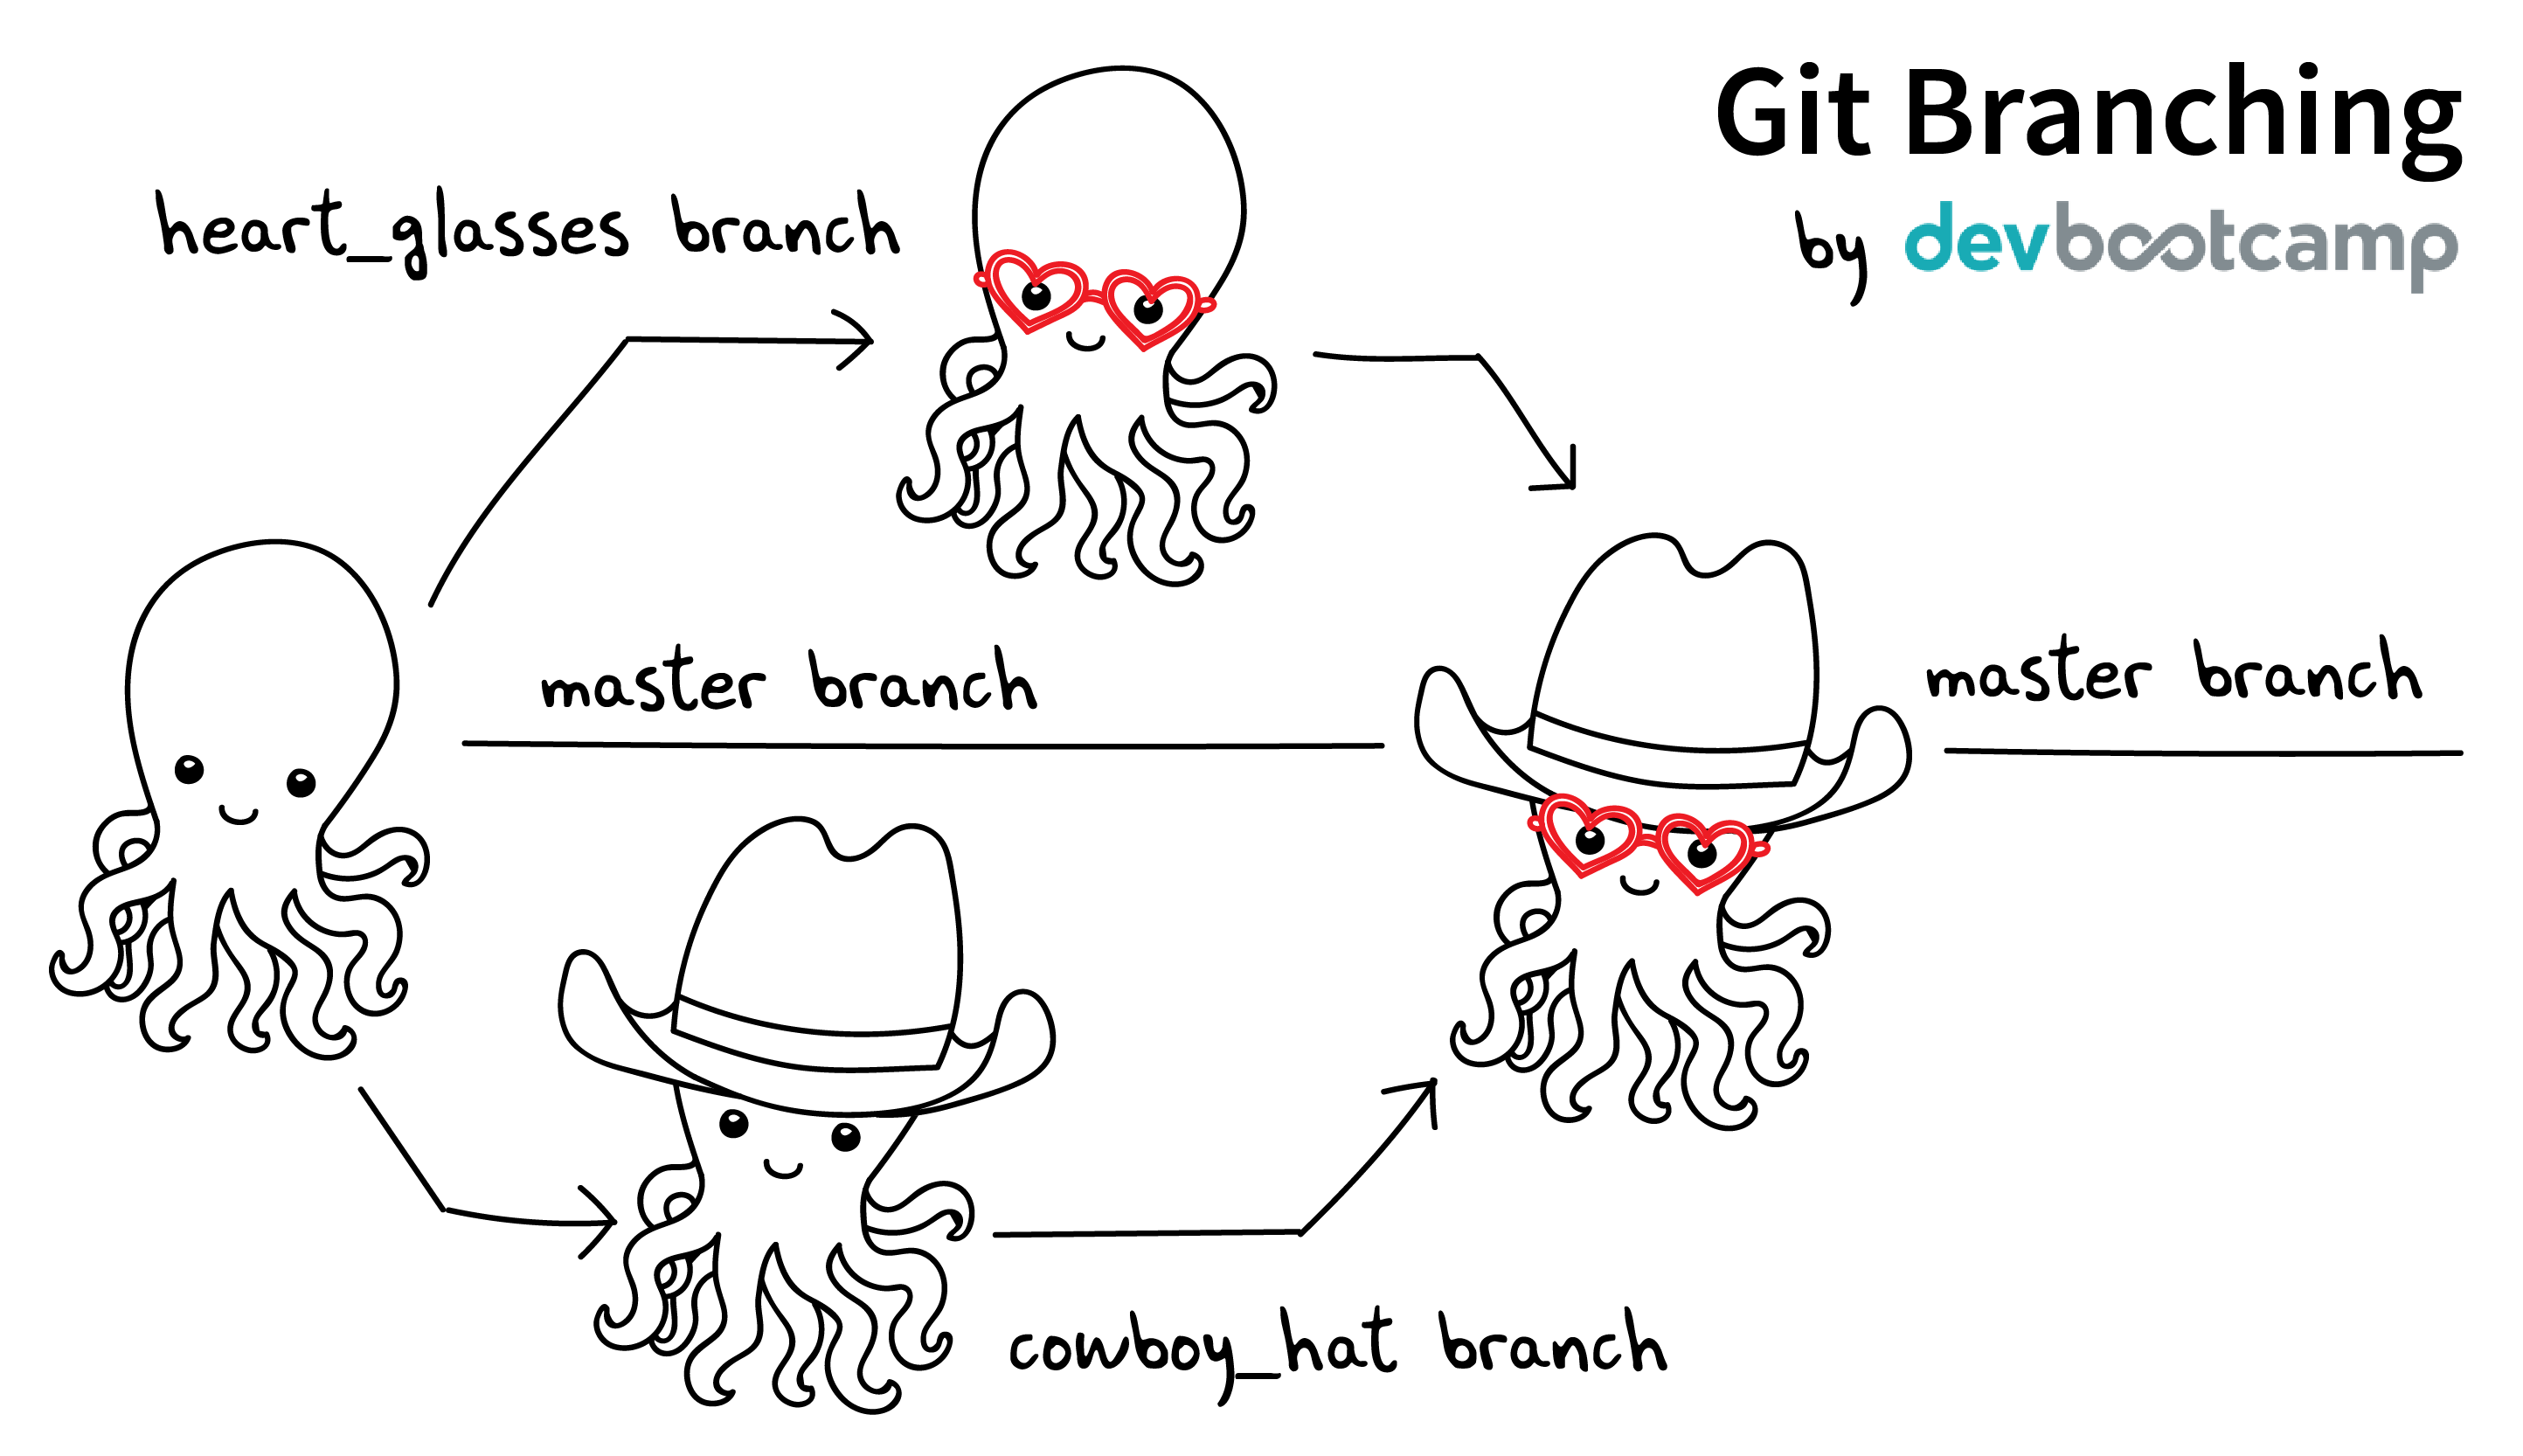
Let's get into a scenario where you were given a feature to implement i.e. Heart Glasses for your octopus (Here onwards we will call him Octie). What will you do?
- You will create the heart_glass branch from your master branch using one of the above branching commands.
- Once you are done with all your changes and know that the glass will look good on Octie;
- You go ahead and merge your heart_glass branch to your master branch, and maybe then delete the heart_glass branch and you will have all your changes in the master now.
- Octie is looking good there, and while you were creating glasses, someone put a hat on Octie. Ain't that nice?
The below image practically sums up the whole process -
Some merge git commands
- merge a different branch into your active branch
git merge <branchname> - Fetch and merge changes on the remote server to your working directory
git pull - View all the merge conflicts
git diff - Preview changes, before merging
git diff <sourcebranch> <targetbranch>
In this blog post, we have deep-dived into branching and merging, and we are one step closer to becoming git masters.
In the next blog post, we will try to cover resetting a branch, tagging, and so much more. I also intend to cover some less-known git features in this series. Do you know you can clone only a subdirectory from a git repo? More on this later!
Stay tuned, follow me on social media channels, and subscribe to my newsletter to get updates on my upcoming posts.